
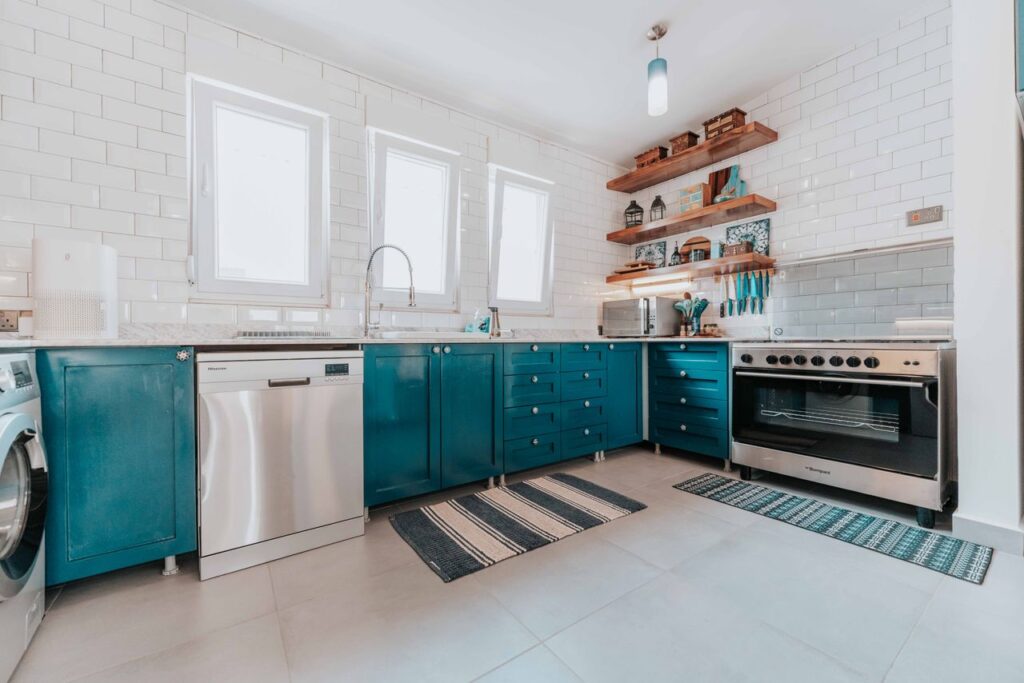
Painting kitchen units is one of the most effective ways to refresh an existing kitchen without replacing every cabinet. A tired, dated, or mismatched kitchen can often look dramatically different after the doors and drawer fronts receive a carefully applied new finish. Looking at painting kitchen units before and after examples can also help homeowners understand just how much difference colour, preparation, and professional application can make.
Instead of removing an entire kitchen and starting again, painting the existing units can provide a more affordable route to a fresh appearance. The transformation can range from a subtle change in colour to a complete modernisation of the room.
However, achieving a good result requires more than simply applying paint with a brush. Proper preparation, suitable products, careful application, and adequate drying time all contribute to the finished appearance. This guide explores the process and explains what homeowners should consider before beginning a kitchen unit painting project.
Why Paint Kitchen Units Instead of Replacing Them?
Replacing a kitchen can be expensive, disruptive, and time-consuming. If the existing cabinets are structurally sound, repainting them may offer a practical alternative.
Kitchen units can become visually dated even when their basic construction remains perfectly usable. A change of colour can make the room feel brighter, cleaner, larger, or more contemporary.
For homeowners who like the existing layout, painting can also preserve a familiar arrangement while updating the appearance. There is no need to redesign the entire kitchen simply because the cabinet finish looks old-fashioned.
The biggest appeal of painting kitchen units before and after transformations is seeing how an existing space can be given a new identity through relatively simple visual changes.
That said, painting is most suitable when the units are in reasonable condition. Severely damaged, swollen, warped, or deteriorated cabinets may require repair or replacement rather than simply receiving a new coat of paint.
The Difference a New Colour Can Make
Colour is one of the most noticeable elements of a kitchen transformation. Changing dark or dated cabinet finishes to lighter shades can create a more open and contemporary appearance.
Neutral colours such as white, cream, grey, beige, and soft green can create a calm atmosphere, while deeper colours can provide contrast and character.
The right colour depends on the size of the kitchen, amount of natural light, flooring, worktops, splashbacks, appliances, and personal taste.
When considering painting kitchen units before and after, it is useful to imagine how the new cabinet colour will interact with the rest of the room rather than selecting a shade in isolation.
Testing sample colours on a small, inconspicuous area can help you see how the paint looks under different lighting conditions. Natural daylight and artificial lighting can make the same colour appear noticeably different.
Preparing Kitchen Units for Painting
Preparation is arguably one of the most important stages of the project. Paint will not hide poor preparation as effectively as many people expect.
Kitchen units can accumulate grease, cooking residue, dust, and cleaning-product deposits. These contaminants can interfere with paint adhesion if they are not properly removed.
The doors and drawer fronts should generally be cleaned thoroughly before painting. Depending on the material and existing finish, additional preparation may include sanding, degreasing, filling imperfections, and applying a suitable primer.
Handles and other hardware may need to be removed so that the finish remains neat and professional.
The exact preparation method depends on the cabinet material. Wood, MDF, laminate, veneer, and previously painted surfaces can all require different approaches.
Following the paint manufacturer’s preparation instructions is important because unsuitable preparation can lead to peeling, chipping, uneven coverage, or other problems later.
Choosing the Right Paint for Kitchen Units
Not every household paint is suitable for kitchen cabinets. Kitchen units experience frequent handling, cleaning, moisture, and temperature changes, so the chosen coating should be appropriate for the intended application.
Specialist cabinet paints, durable furniture paints, and other coatings designed for high-use surfaces may provide better results than standard wall paint.
The finish is also important. Matt, satin, eggshell, and other finishes can produce different appearances and levels of visual sheen.
A durable finish is particularly valuable for cabinet doors and drawer fronts because these surfaces are touched frequently.
Before purchasing paint, check whether it is specifically recommended for the cabinet material and intended level of use. Primer compatibility is equally important when one is required.
The goal is not simply to create a beautiful colour but to produce a finish that can withstand everyday kitchen life.
Removing Doors and Hardware
For many kitchen painting projects, removing cabinet doors and drawer fronts can make the work easier and produce a cleaner result.
Painting doors while they are still attached can make it difficult to reach edges, hinges, corners, and other areas evenly. Removing them allows the surfaces to be positioned more conveniently and reduces the risk of paint getting onto surrounding cabinets or hardware.
Before removing anything, label the doors and hardware so that everything can be returned to its original position. A simple numbering system can prevent confusion, particularly in a larger kitchen.
Handles, hinges, and other removable hardware should be stored safely during the project.
If some components are not intended to be painted, protecting them carefully is essential. Taking time at this stage can make the final painting kitchen units before and after difference much more noticeable.
Applying Primer and Paint
Once the surfaces are clean and properly prepared, the painting stage can begin.
Primer may be required depending on the surface and paint system being used. A suitable primer can improve adhesion and help create a consistent base for the topcoat.
Paint should generally be applied in thin, even coats rather than one excessively thick layer. Several carefully applied coats can provide better coverage and a smoother finish.
The method of application depends on the product and desired result. Brushes can be useful for certain edges and details, while rollers or spray equipment may provide a smoother finish on suitable surfaces.
If using a spray system, proper preparation and protection of the surrounding area are especially important.
Allow each coat to dry according to the manufacturer’s instructions before applying another. Rushing the process can cause marks, sticking, uneven surfaces, or other finish problems.
Creating a Professional-Looking Finish
A high-quality finish is what separates a basic repaint from a convincing kitchen transformation. Small imperfections can become very noticeable on large, flat cabinet surfaces.
Avoid overloading the brush or roller with paint. Excess paint can lead to runs, drips, and uneven texture.
Pay close attention to edges and corners, where paint can build up. Maintaining a consistent application technique throughout the kitchen can also help create a uniform appearance.
Dust and debris should be kept away from freshly painted surfaces while they are drying.
For homeowners who do not have the time, equipment, or confidence to achieve the desired finish, hiring an experienced kitchen painter can be worth considering.
Professional application may be particularly useful for large kitchens, intricate cabinet designs, or projects requiring spray-finishing techniques.
Before and After: What Changes Can You Expect?
The most satisfying part of the project is seeing the completed transformation. A kitchen with dark, worn, or dated cabinets can look significantly different after repainting.
A lighter colour can make cabinetry appear fresher and can change the visual balance of the room. A bold colour can create a stronger focal point. Even a simple neutral repaint can make the kitchen feel cleaner and more cohesive.
Replacing handles at the same time can enhance the transformation further. New hardware can complement the painted units and reinforce the chosen style.
Other small updates, such as improved lighting, new accessories, or refreshed walls, can also work alongside painted cabinets.
However, it is important to keep expectations realistic. Painting changes the appearance of the units but does not alter their underlying layout, construction, or functionality.
The strongest painting kitchen units before and after transformations typically combine appropriate preparation with a colour choice that works harmoniously with the rest of the room.
Common Mistakes to Avoid
Several mistakes can reduce the quality and durability of a kitchen cabinet painting project.
One common problem is insufficient cleaning. Grease and residue can prevent paint from bonding properly.
Another mistake is skipping preparation because the existing finish appears smooth. Depending on the surface, light sanding, priming, or another preparation method may be necessary.
Using unsuitable paint can also cause problems. Kitchen cabinets require a coating appropriate for frequent handling and cleaning.
Applying coats too thickly or failing to allow sufficient drying time can affect the final appearance.
It is also easy to underestimate the amount of time required. Removing doors, preparing surfaces, applying multiple coats, waiting for them to dry, and reinstalling hardware can take considerably longer than expected.
Finally, avoid judging the final finish too early. Some coatings continue curing after they appear dry, so follow the manufacturer’s guidance before subjecting newly painted surfaces to heavy use.
Is Painting Kitchen Units Worth It?
For many homeowners, painting kitchen units can be a worthwhile way to refresh an existing space. It can provide a major visual improvement without requiring the expense and disruption associated with a complete kitchen replacement.
The approach works particularly well when the existing cabinets are structurally sound and the homeowner is happy with the current layout.
The total cost depends on several factors, including the number of doors, cabinet material, preparation requirements, paint system, hardware, labour, and whether professional spraying or hand painting is used.
DIY painting can reduce labour costs, but professional work may provide a more consistent finish and save considerable time.
Before starting, compare the cost of repainting with replacement and consider how long you expect to remain in the property.
Ultimately, the best painting kitchen units before and after results come from combining realistic expectations, suitable materials, thorough preparation, and careful workmanship.
Conclusion
Painting kitchen units can transform the appearance of a kitchen while allowing homeowners to retain an existing layout and cabinetry. A well-planned repaint can make dated units look fresher, introduce a completely new colour scheme, and give the room a more modern personality.
The quality of the result depends heavily on preparation. Thorough cleaning, appropriate surface preparation, suitable primer where required, durable cabinet paint, careful application, and sufficient drying time are all important.
Looking at painting kitchen units before and after examples can provide inspiration, but every kitchen is different. Consider the existing cabinet material, natural light, worktops, flooring, appliances, and overall style before choosing a colour and finish.
For homeowners who want a smooth, durable, professional appearance but do not have the equipment or experience to achieve it themselves, professional kitchen unit painting can be an attractive option.
With the right approach, repainting can turn tired-looking cabinetry into one of the most noticeable features of a refreshed kitchen.
FAQs
1. Can all kitchen units be painted?
Many kitchen units can be painted, but the preparation and products required depend on the cabinet material and existing finish. Wood, MDF, laminate, and veneer surfaces may require different preparation methods. Always check product recommendations before starting.
2. How long does it take to paint kitchen units?
The timeframe depends on the size of the kitchen, number of doors, preparation required, number of coats, and drying or curing times. A complete project can take several days when preparation and drying between coats are included.
3. Is it better to spray or brush kitchen units?
Both methods can work. Spraying can produce a smooth, uniform finish when performed correctly, while brushes and rollers can be practical for DIY projects. The best method depends on the paint system, cabinet design, equipment, and level of experience.
4. Do I need to sand kitchen units before painting?
Sanding requirements depend on the existing surface and the paint system being used. Some surfaces may need sanding to improve adhesion, while others may require specific preparation instead. Follow the manufacturer’s instructions for the chosen products.
5. How durable are painted kitchen units?
Durability depends on the surface preparation, paint system, application quality, and how the cabinets are used. Choosing a coating designed for kitchen or furniture surfaces and allowing adequate curing time can help create a more durable finish.
Also read: Kitchen Cupboards Painted Before After: UK Makeover Ideas